
Cyclists Hub is supported by its readers. We may receive a commission if you buy products using our links. All content on Cyclists Hub is written by humans, not robots. Learn More
This article teaches you to set up wheel-on and direct-drive bike trainers so you can start riding the one you have at home.
I’ll also give you a few tips for using a bike trainer and avoiding beginner mistakes when starting with training indoors.
KEY TAKEAWAY
Remember that the process of setting up wheel-on and direct-drive trainers differs. When using a wheel-on trainer, you have to replace the quick-release in your rear wheel with the supplied one. Then, adjust the cylinder so it touches the tire.
When using a direct-drive trainer, make sure it has a mounted cassette and use the correct adaptors. Then, take off your rear wheel and attach it to the trainer.
Continue reading for more info.
Ensure You Do This Before You Set Up a Bike Trainer
Before you set everything up, you should prepare your bike and the place where you’ll set up the trainer. Here are the three most important steps.
- Clean your bike to avoid messing up your room or pain cave. Focus mainly on cleaning (and then lubing) your chain.
- Find a level floor, ideally in a room with a window. You can also use a fan to stay cool down.
- Use a bike trainer mat to protect the floor against scratches and sweat. You can also put your trainer on a carpet, but a mat or a plate is a must. A tiled floor is one of a few exceptions where you don’t need them.
How to Set Up a Wheel-on Bike Trainer?
Step 1 (Optional): Change your rear tire for a bike trainer tire. It will be quieter, last longer, and won’t smell like burning rubber.
Step 2: Inflate the rear tire to a tire pressure that allows you to squeeze it slightly. Don’t inflate it too hard because you may get less traction with the trainer’s cylinder.
Step 3: Replace the rear quick-release skewer with the one that was supplied with the bike trainer. They are usually made of steel to handle the forces transferred from the frame to the rear triangle. If you have a disc brake bike, use a supplied adaptor or buy one.

NOTE: Don’t use titanium skewers with bike trainers. You risk damaging them.
Step 4: Mount your bike onto the trainer and lock it. Use a front-wheel riser or a stack of books to level your front wheel.

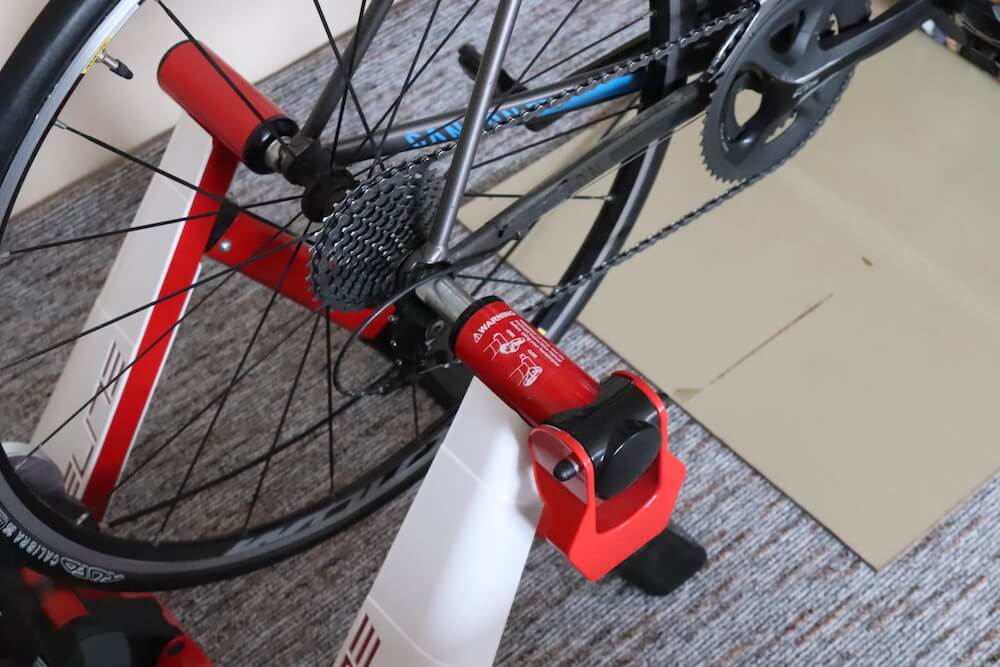
Make sure the nut fits the groove.

Step 5: Adjust the cylinder to touch the tire. It shouldn’t push too hard against it. Otherwise, you risk blowing up the tire. But it shouldn’t be too loose so that it won’t give you enough traction. This takes a little bit of practice and tweaking.


PRO TIP: Once you’ve finished your training, unlock the cylinder to release the pressure on your tire and the cylinder.
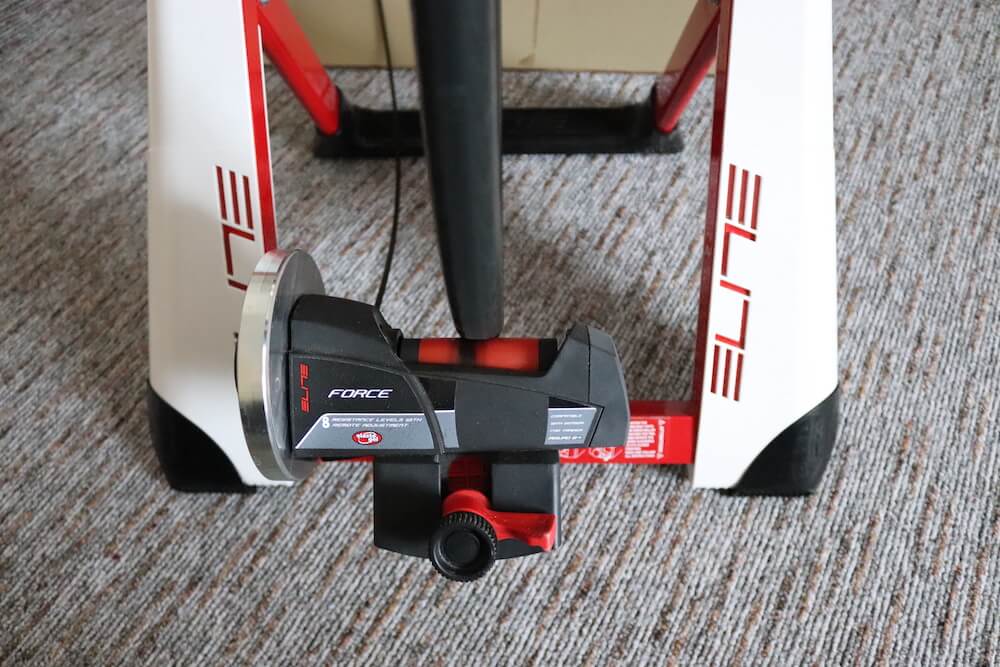
How to Set Up a Direct-drive Bike Trainer?
Step 1: Mount a cassette onto the direct-drive trainer. Some direct-drive trainers come with a cassette, but some without it. If you don’t have two cassettes, you can use the one from your rear wheel. If the trainer comes with a cassette, make sure it is compatible with your groupset.

Step 2: Switch gears to the smallest sprocket and take the rear wheel off. If you have a disc brake bike, use a brake pad spacer (or folded business card) to prevent brake pads from clamping each other.
Step 3 (quick-release): Mount your bike onto the trainer and lock the quick-release adaptor. Then, tighten the skewer and ensure the bike is stable.
Step 3 (through-axle): Mount your bike onto the trainer and screw in the through-axle. Some bikes/trainers may require you to screw in an adaptor to the drive side of your bike. Then, tighten the skewer and ensure the bike is stable.


How to Use a Bike Trainer and Avoid Beginner Mistakes?
Here are three tips that will help you avoid beginner mistakes when you get started with indoor cycling.
1. Prepare a Drink (and Food)
The longer your ride, the more important it is to keep yourself hydrated. Ensure you have enough water on hand to avoid stopping and interrupting your training.

If you’re like me (always hungry), prepare, prepare some food too. It can be a quick snack like bread with jam, toast, a banana, or anything else you’re used to eating when riding your bike.
2. Do Warm Ups and Cool Downs
Don’t just jump on the trainer and start pedaling hard. Instead, take it easy and warm up your muscles for 5-15 minutes. It prepares the body for upcoming efforts. I recommend reading this article on the Importance of Cycling Warm-Ups by TrainingPeaks if you want to learn more.
Post-training cooldowns, on the other hand, help flush lactic acid, help dissipate heat, and much more.
3. Try a Structured Training
Riding a bike trainer without any goal or structure is fine if you just want to spin your legs occasionally.
But having some structured training is much more effective. Not only because of the results you get but also for your motivation.

You don’t have to think about your next training when you know what you have in your training plan. You simply jump on the trainer and start riding.
4. Get a Fan
The first tip I got from my friend who does cycling for a living was to get a fan. When we ride outside, we are cooled by the air. But indoors, the air is still and doesn’t provide us with any cooling.

That’s why indoor cycling fans are so helpful. You don’t even have to spend hundreds of dollars on them. Just get one or two desk fans, and you will experience a big difference in comfort and performance.
5. Don’t Overdo It
It may be easy to get caught up in indoor cycling apps and spend countless hours training indoors.
I trained about 6-7 hours a week indoors for three months during one of my off-seasons. I felt great. The training helped me boost my endurance (it included multiple 3-hour blocks).

But honestly, it required a lot of willpower, and one negative side effect occurred the next off-season.
I couldn’t find the willpower to train indoors anymore. I overdid it. Don’t make the same mistake as I did. Always try to find balance.
Summary
Setting up a bike trainer differs depending on the bike trainer type (wheel-on vs. direct-drive) and brakes type (disc vs. rim).
One of the most important things is to replace the rear quick-release skewer (or through-axle) with the supplied one (eventually, use the supplied adaptors). Then, mount the bike and ensure it is securely locked.
If you have any questions about setting up a bike trainer, feel free to contact me or add a comment below.
Setting Up and Using Bike Trainers FAQ
Explore More From Indoor Cycling Content
Apps
Best Indoor Cycling Apps
Zwift Review
ROUVY Review
TrainerRoad Review
Wahoo SYSTM Review
MyWhoosh Review
FulGaz Review
Kinomap Review
TrainingPeaks Virtual Review
Bike Trainers & Rollers
Best Bike Trainers
Best Smart Bike Trainers
Best Budget Bike Trainers
Best Bike Trainers for Zwift
Best Bike Rollers
Best Bike Trainer Brands
Best Fluid Bike Trainers
Place the bike trainer on a level surface and put a towel or a mat underneath to protect your floor and reduce noise and vibrations.
Always start with a warm-up to prepare your muscles for the workout. Pedal at an easy pace for 10-15 minutes.